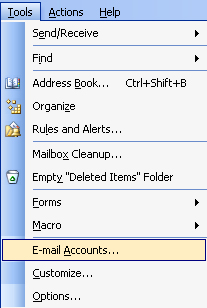
1. Open Outlook, click on the Tools menu, then E-mail Accounts...
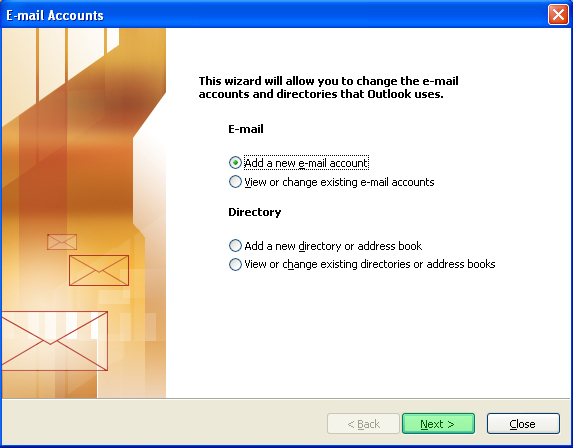
2. This will bring up the "E-mail Accounts" window. Select "Add a new e-mail account" and click on the Next button.
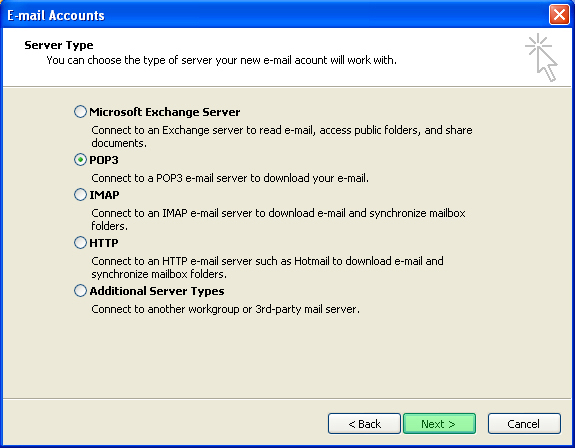
3. Then select the "POP3" option and click on the Next button.
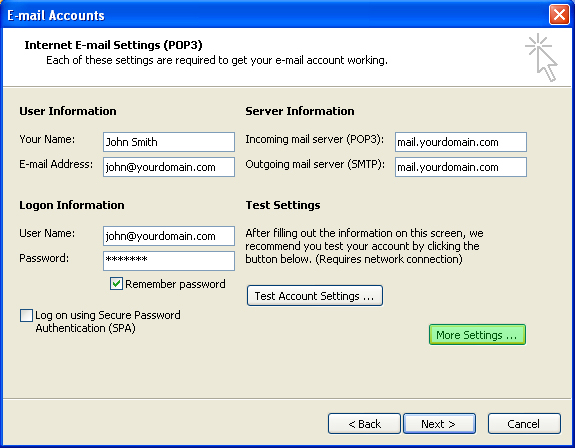
4. This will bring up the POP3 E-mail account settings options
5. User Information
a) "Your Name" is just the name you'd like your email to appear "from"
b) Simply enter your e-mail address in the e-mail address field
6. Server Information
a) Both the incoming and outgoing servers are simply going to be mail.yourdomainname.com
7. Logon Information
a) Make certain that your username is set to your entire email address.
b) Enter in the password for your account, "remember your password" is optional.
8. Once you've entered in all the correct information, click on the More Settings... button.
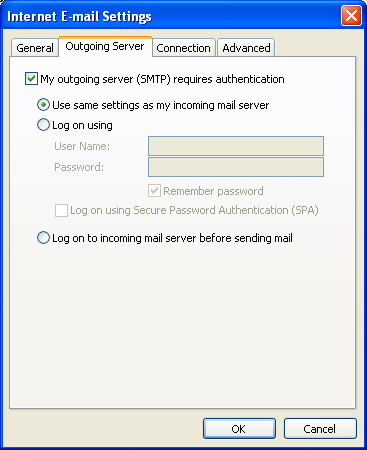
9. A new window will open up, click on the "Outgoing Server" tab and make sure the checkbox for "My outgoing server (SMTP) requires authentication.
10. Then click on the "Advanced" Tab
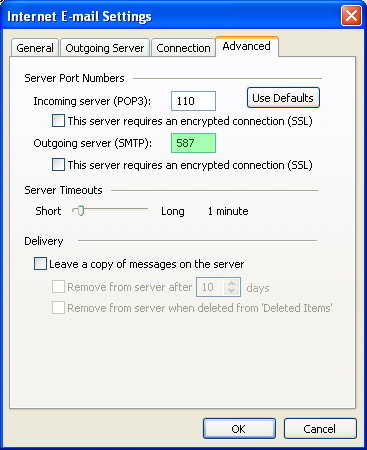
11. For faster and more reliable sending, we highly recommend changing your outgoing port to 587
12. Once you've made those changes, click on the "OK" button, then click on the "Next" button once it takes you back to the E-Mail Account Information window, and finally click the "Finish" button and you'll be able to send and receive email using Microsoft Outlook!
